
QuickBooks has been suffering from multiple issues while users try to connect with the email server. QuickBooks could not connect to the Email Server error emerges when users try to send their company-related emails through QuickBooks but instead come across this troublesome technical snag. The major cause behind this error is some technical fault with the QuickBooks Desktop Webmail feature. Other causes and associated solutions to fix QuickBooks could not connect to email server are covered thoroughly in this blog. So, keep reading.
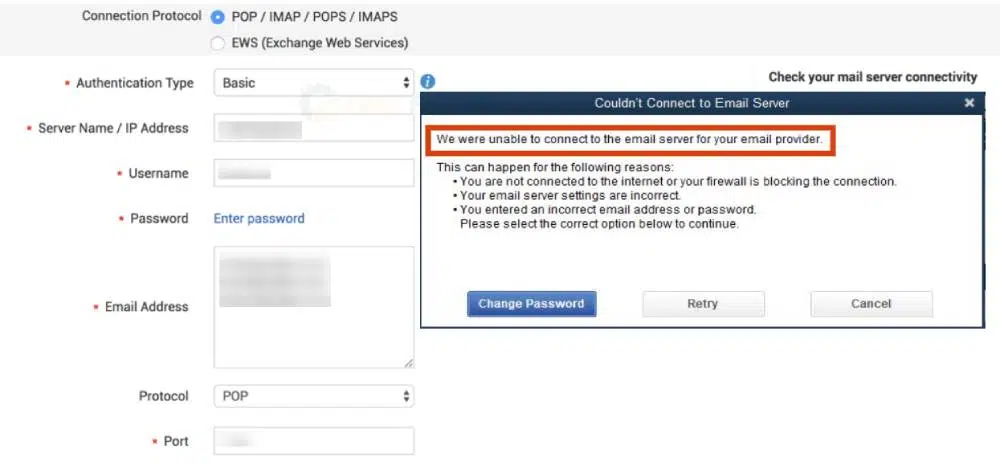
Why QuickBooks could not connect to the email server error shows up?
- Users may be accessing the email account by entering incorrect credentials.
- Misconfigured settings of the email server my lead to this error.
- QuickBooks Desktop not updated for a long time.
- The internet connection is poor. As such all attempts of sending email are foiled.
- Due to improperly configured Internet Explorer settings, QuickBooks could not be able to connect to the email server.
Methods to fix QuickBooks could not connect to the email server error
Checkout the following methods in order to quickly rectify the ongoing error:
Method 1: Change the Settings in Webmail Preferences
- To begin, run QuickBooks Desktop.
- Choose "Preferences" from the "Edit" menu.
- Choose "Send Forms".

- Under "My Options," choose the email account.
- Click on "Edit".
- Choose "Edit Email Information".
- Next, navigate to "SMTP Server Information."
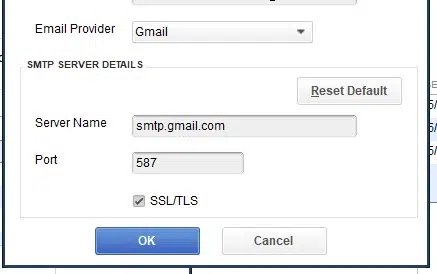
- Input the right server name and port number into the required areas.
- Examine the most frequent email server addresses for further information (POP3, IMAP, SMTP).
- After making the changes, resend an invoice using QuickBooks Webmail to double check if the snag has been overpowered.
Method 2: Change the I.E., settings to Default
- Open Internet Explorer.
- Now, tap on the gear icon to access "Internet Options" in the upper-right corner.
- Next, select "Advanced".
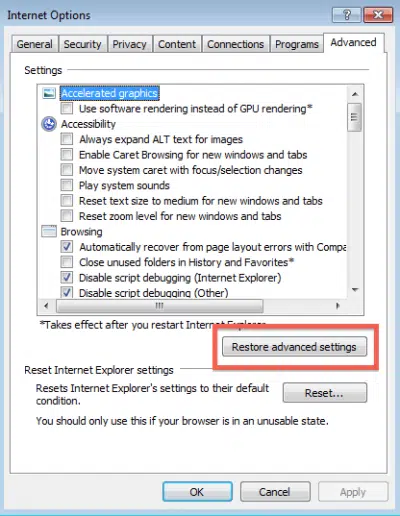
- After that, choose the "Restore Advanced Settings" option.
- Next, press "OK"
- Subsequently, send an email through the webmail.
Method 3: Update QuickBooks
- Run the QuickBooks Desktop program.
- Thereafter, select the "Update QuickBooks" option in the "Help" tab.
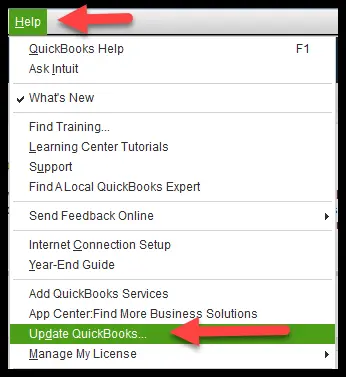
- Follow up with the subsequent options to get QuickBooks updated to the latest version.
- Finally, try sending an email through the webmail to determine whether the QuickBooks could not connect to email server got fixed.
Summing Up!
This article showcased all the contemporary methods to fix "QuickBooks Could Not Connect to Email Server" error. If users are still unable to send emails or connect to the email server, they should directly call our QuickBooks desktop error support experts at the helpline 1-800-761-1787.


